The Kirby Sentria is more than a great alternative to the common vacuum cleaner. It’s a complete home care system. Far more versatile than any vacuum. It is also more durable, because it’s predominantly metal, not plastic. You will save money over the years.

The Kirby Sentria is also simple to operate. You will save time using it. With its powerful airflow, combined with the micron magic HEPA filtration system. It has micro allergen technology which makes the Sentria does the job right.
There is nothing like your Sentria, because there is no company like Kirby. For over 90 years Kirby has provided customers with complete satisfaction. Kirby constantly evaluate every design detail and improvement. Kirby carefully assembles every product by hand and they test every piece in part.
Using everything, from the latest quality automation, to good old fashioned workouts. Kirby also supports every Sentria vacuum with one of the best warranties in the business. If you ever have questions, your local Kirby distributor is just a phone call away.
This guide will answer most of the questions any new Sentria vacuum owner might have. You can also use it later to review specific procedures. Be sure to refer to your Sentria use and care booklet.
This is part 1 of the Kirby Sentria Parts and Accessories, for part 2 please press the button below.
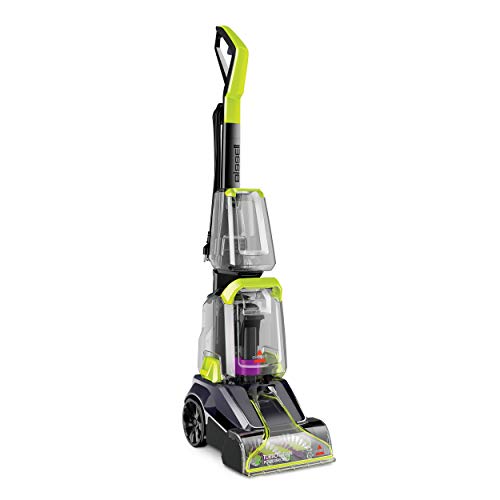
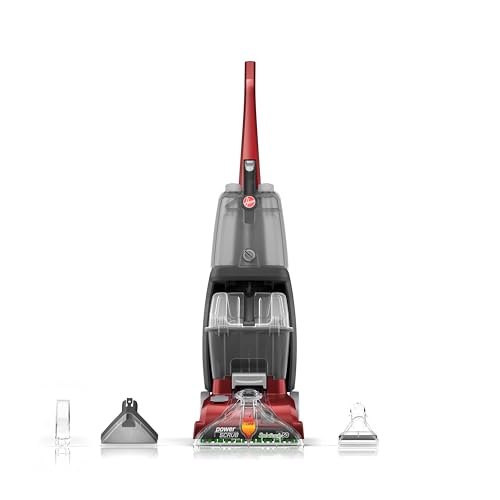
Carpet Cleaners | Recommended

Introduction
Learn how to get the most out of your complete home care system. Because the more you learn about your Sentria, the more you will enjoy how it works for you. This Sentria is one of the most complete, advanced and easy to use home maintenance systems available today.
A product for those who appreciate quality, reliability and performance. This article owner’s manual will help you take advantage of the Sentria’s many features. It has been divided into sections for easy reference.
Part one will familiarize you with a few basics Sentria features. Part two will describe to you how to use your Sentria as an upright and as a portable cleaner. Part three will help you set up your Sentria as a canister cleaner and show you how to use its wide range of attachment.
When you need a refresher, you can choose the specific section or item you would like to review. Please note this article is not intended to replace your Sentria owner’s manual. It can help you get started, but if you need more information you have to consult the owner’s manual, included with your Sentria.
Would you like to buy a Kirby vacuum cleaner? Head over to Amazon and buy yours today. Are you looking for Kirby Sentria parts and/or accessories? Have a look at the Amazon information boxes on this page.
Related Post: Are Kirby Vacuum Cleaners Worth the Money?
General Information
This section covers general information you will need to begin using your Sentria.
It includes:
Moving and carrying your Sentria using the handle tilt latch.
Using the toe touch control.
Adjusting your vacuum for proper power nozzle height.
Using tech drive power assist.
Installing or changing allergen reduction disposable filter bags.
Emptying the Mini Em-Tor.
Understanding the belt lifter.
Tech Drive
Your Sentria is equipped with tech drive. This variable power assist actually senses the speed and direction of the Sentria. It provides up to 90 percent of the power required to move it back and forth. To engage the tech drive, you have to push down on the red side of the tech drive pedal.
Tech drive must be turned off in order to push your Sentria when the motor is not running. You have to raise the nozzle and push down on the gray N-side of the power assist panel. The “N” stands for neutral. Turn the power off and unplug the Sentria. Now you should be able to push the Sentria freely.
Tilt Latch
Your Sentria also has a convenient handle tilt latch. Which allows you to lift the front of the Sentria over door thresholds or throw rugs. To do so, push the handle tilt latch towards the bag. Then pull back on the handle until the front of the Sentria lifts up.
The tilt latch will also allow you to store your Sentria a in a vertical position. Lower the handle all the way down and move the tilt latch away from the bag. You can now stand the Sentria up on its bumper for storage.
When you’re ready to use the Sentria again you need to unlock the handle tilt latch by moving the tilt latch to the center position. Never unlock the handle tilt latch without holding on to the handle. The handle is spring loaded and could fly up when unlatched.
Power Nozzle Adjustment
It is important to adjust the power nozzle to its proper operating height. Make sure the power nozzle is up, by stepping on the toe touch control bottom pedal. Now turn the Sentria on. The toe touch control adjusts the power nozzle to 7 different positions. The highest 4 positions are used for attaching accessories. Positions number 1 to 3 are used for carpet and floor cleaning. Positions number 1 to 3 are indicated when the numbers show directly in front of the toe touch control upper panel.
Turn the vacuum on and press the toe touch control upper panel 4 times, until you see the number 3 in front of the toe touch control upper panel. You are now in the highest floor cleaning position, used for high pile carpets. Press one more notch down until you see the number 2 in front of the toe touch control upper pedal, for the medium position.
This is the most widely used position for all types of carpet. Push one more notch down for low. You will see the number 1 in front of the toe touch control upper pedal. This is the lowest position and can be used for low pile carpet and hard floor cleaning.
As a quick adjustment procedure you have to step on the upper pedal. Lowering the power nozzle one notch at a time, until you hear a change in the tone of the motor. This means your Sentria has sealed to the carpet. Then press the toe touch control upper pedal one more time and your power nozzle will be at the proper height.
Disposable Filter Bag
A disposable filter bag is required for proper operation of your Sentria. Before installing or changing a disposable filter bag you have unplug the power cord from the wall outlet. Make sure the motor and fan have stopped. Then unzip the outer bag, starting on the top left and continuing all the way down the right side.
Pull out the top adapter and the disposable filter bag. Always replace the disposable filter bag when dirt reaches the full line. Failure to do so will affect performance. Hold the top adapter steady while you turn the disposable filter bags cardboard face plate to the left. Gently pull off the bag and throw it away.
To install a new filter bag you have to align the slots in the cardboard face plate with the lock tabs on the adapter. Then push the adapter into the bag opening and rotate the cardboard face plate to the right of the disposable filter bag. The bag support strap should be attached to the top adapter.
This is required for proper operation. If it is not attached you have to thread the strap through the small hole of the top adapter. Then place the hole in the strap over the stud on the adapter. Finally, insert the bag adapter and the new filter bag into the outer permanent bag and zip it close. To purchase replacement disposable filter bags have a look on Amazon.
Mini Em-Tor
The Mini Em-Tor is designed to collect large and heavy particles which can be emptied by removing the Mini Em-Tor. To remove, grasp the Mini Em-Tor underneath by its handhold and rotate it away from the body of the Sentria as far as it will go. Then lift the Mini Em-Tor off.
The top of the bag is released from the handle by pressing the bag release button. Position the front opening over a newspaper and shake it to remove the particles. Though your Sentria can remove larger debris from your floors you should never intentionally pick up heavy objects, such as coins, screws, large rocks or similar objects. It may cause damage to your Sentria.
To re-attach the bag assembly you have to line up the raised indicator line on the Mini Em-Tor with the indicator line on the air exhaust port. Then rotate the Mini Em-Tor towards the Sentria and lock it in place. The Mini Em-Tor must be securely locked into place or the Sentria will not operate.
The belt lifter on your Sentria serves two purposes. The first use is to engage or disengage the brush roll. The second use is to allow removal of the power nozzle, when converting your Sentria for use with various attachments and optional accessories. To disengage the belt and prevent the brush roll from rotating, make sure the power nozzle is raised to its highest setting. Make sure the Sentria is unplugged. Raise the headlight hood and flip out the handle on the belt lifer.
Turn the handle to the left or counter clockwise until it stops and the red arrows lineup. Now return the handle to its closed position. Lower the headlight hood and your Kirby Sentria is ready for use as a straight suction cleaner.
To re-engage the belt in order for the brush roll to rotate. Turn the belt lifter to the right or clockwise until the green arrows lineup. Turn the handle to the closed position and lower the headlight hood. Your Sentria is also equipped with an innovative brush roll indicator light.
It is located on the top of the power nozzle. When the brush roll is operating properly, the light will shine continuously. If the brush roll indicator light flickers or does not come on when using the power nozzle it means the brush roll is not working properly. Either the belt is not engaged or it may need to be replaced.
Using your Kirby Sentria
This Kirby Sentria is an extremely versatile home care system. In this section we will cover:
Using your Sentria as an upright cleaner.
Using your upright as a straight suction cleaner.
Cleaning hard surface floors.
Using your Sentria as a portable cleaner to clean carpeted stairs and mattresses.
Cord management.
Before you begin cleaning with your new Sentria it is important to have the power nozzle adjusted to the proper height setting. This gives you the most efficient cleaning action and lengthens belt life. Straight suction cleaning allows you to vacuum hard floors, throw rugs and delicate carpets.
Without the use of the brush roll. When using the Sentria on any hard surface flooring, make sure tech drive is in neutral. With the Sentria off, turn the belt lifter left or counter clockwise until the red arrows are lined up. The brush roll is now disengaged and your Sentria while operate as a straight suction cleaner.
By attaching the optional hard floor pad, you can dust bare floors. Before installing the hard floor pad unplug the power cord from the wall outlet and make sure the motor and nozzle brush have stopped. Make sure the nozzle is set to the highest setting.
Attach the hard floor pad on to the nozzle opening, using the spring clips on the plate. Now plug the Sentria in. Make sure the tech drive is in neutral and turn the power on. Then lower the nozzle until the bristles touch the floor.
Portable Cleaner
Besides being a remarkable upright cleaner, the Sentria can easily be converted into a portable cleaner. for surfaces like mattresses or carpeted stairs. To reduce risk of injury in the portable mode, place tech drive in neutral and keep hair away from the rotating brush inside the nozzle. To convert your Sentria into a portable cleaner you have to make sure the Sentria is turned off and unplugged. Release the outer permanent bag by pressing the bag release button.
Remove the power cord from the upright handle. Now push the release button located at the base of the handle and pull the handle straight up and out of the slot. Then push the portable handle into the same slot and insert the bag latch tab into the slot on the portable handle. You are now ready for portable power cleaning.
On carpeted stairs, simply roll the cleaner back and forth so the brush roll agitates the carpeting and loosens the dirt. Cleaning soft mattress surfaces is done the same as carpeted surfaces. Your Sentria should be set up as a portable cleaner. Make sure the tech drive is turned off and the brush roll is disengaged before turning the Sentria on. Lower the power nozzle and begin vacuuming.
The Sentria system upright handling incorporates a series of hooks and fasteners. To keep the cord off the floor and attached to the upright handle for your convenience. When using the Sentria system as an upright. You have to snap the power cord into the two cord holders located on the back of the handle. Put the upper cord hook in the “up” or twelve o’clock position.
Route the cord towards the rear of the unit and slide the cord into the C-shaped holder on the upper cord hook. The cord can now be wrapped around the upper and lower cord hooks for storage. To quickly release the cord for use you have to rotate the upper cord hook down to the six o’clock position. The C-shape holder is designed to hold the cord securely in place and prevent the first loop from dropping to the floor.
Canister Cleaner & Attachments
Your Kirby Sentria comes with a wide variety of attachments for added versatility. In this section will discuss.
When using different attachments, you need the attachment hoses to connect to the front of the cleaner in the place of the power nozzle. The attachment hose may be used in either the upright or portable configuration. To install the attachment hose you have to raise the nozzle. Place the tech drive in neutral and turn the power off. Unplug the Sentria out from the wall outlet. Raise the headlight hood and turn the belt lifter to the left or counter clockwise until it stops and the red arrows lineup. Release the power nozzle and lifted off the Sentria. In normal operation, friction between the belt and the metal motor shaft may cause the metal motor shaft to be extremely hot.
At the connector end of the attachment hose you will notice 2 hooks. Hook the hose end over the attaching bar and then lock it in place by turning the accessory lock clockwise all the way to the right. Now lower the headlight hood. With the attachment hose in place, the Sentria will automatically adjust to high speed hose operation.
To attach tools to the hose you have to push lightly, while twisting the tool onto the hose. The duster brush may be connected to the attachment hose or the extension tubes to remove dust from any surface. Including contoured or irregular surfaces.
Upholstery Nozzle
The upholstery nozzle is used for cleaning upholstered furniture, carpeted steps, clothing and the inside of cars. One or two extension tubes can be attached to the end of the hose to extend your reach and efficiently use various attachments. The suction control grip features a valve to control the amount of suction.
Simply slide the valve control back and forth until the desired level of suction is reached. The suction control grip can also be used with the attachment hose, between the extension tubes. Or it can easily be moved to the end of the tubes giving your brush attachments a different angle with which to clean.
Attach the wall and ceiling brush to the suction control grip. To clean walls, ceilings and other hard to reach surfaces. By rotating the brush you can clean hard to reach places like ceilings. The crevice tool, with a removable brush, cleans dirt from tight places and carpet edges.
Remove the brush and the crevice tool can be used for cleaning cracks, crevices, corners, grooves and narrow openings. The surface nozzle may be used on bare floors or for surface cleaning carpets and under low furniture. Rubber wheels on the nozzle allow it to glide smoothly on the surface of hard floors without scratching.
Sentria Blower
Your Sentria can also be used as a blower. In either the upright or portable vacuum configuration. To do so you have to raise the power nozzle. Now place the tech drive in neutral and turn the power off. Unplug the Sentria from the wall outlet. Raise the headlight hood and turn the belt lifter to the left or counter clockwise until the red arrows lineup.
Unlock the power nozzle and remove it from the Sentria. Then fasten the air intake guard onto the attaching bar and lock it in place by turning the accessory bar all the way to the right or clockwise. Lower the headlight hood. Remove the Mini Em-Tor and release the top of the bag assembly.
Attaching the Blower Hose
To attach the blower hose you have to line up the indicator line on the large end of the hose with the indicator line on the metal exhaust port. Twist the hose connector to the right to lock in place. By attaching the inflator/deflator tool to the attachment hose, you can inflate toys, air mattresses or other similar low pressure inflatable items.
To deflate items you have to take the blower hose off the Sentria. Clip the bag into place and attach the Mini Em-Tor. Now lift the headlight hood and remove the air intake guard. Then connect the attachment hose to the front of the Sentria. You may now use your Sentria to deflate items.
Portable Kirby Sprayer
The portable sprayer is used only in the blower mode. It is an excellent tool to apply to many different types of water based liquids, to any type of surface. Never use oil or solvent based paint of any kind in the portable sprayer. The motor is open to the spray and could ignite flammable and volatile paint solvents.
To set up the portable sprayer you have to unscrew the jar and fill three quarter full with any non-flammable liquid. If the Kirby sprayer must be tilted during use, less solution should be used to avoid large droplets in the spray. Screw the jar in the portable sprayer tightly together.
Make sure your sprayer is set up as a blower unit. The air intake guard should be on the front of the unit and the attachment hose should be connected to the exhaust port. Connect the sprayer to the attachment hose and turn the Sentria on and squeeze the trigger.
Spraying nonflammable solution with the nozzle pointed away from you and adjusting the spray by turning the spray adjustment control on the trigger. Always squeeze the trigger fully to permit maximum flow and spray control. Immediately after use you have to empty the jar and wash it with warm water. The portable sprayer dip-tube should also be removed and washed. Remove the nozzle jet by pressing the two latches on the front and pulling it out.
Now clean the inside of the sprayer and nozzle jet. When dry, return the nozzle jet to the front of the sprayer. Reassemble the rest of the sprayer so none of the parts will be lost. Never clean the portable sprayer with flammable cleaning fluids. The motor is open to the spray and could ignite flammable and volatile solvents.
Portable Shampooer
The portable shampooer is also used in the blower mode only. It is designed for fast and easy cleaning of carpeted stairways and areas that are difficult to reach with the carpet shampoo system. The portable shampooer is not recommended for use on upholstery or delicate fabrics, such as silk, brocade or velvet. If in doubt, try a test patch. Let the patch dry and check it before you shampoo further.
Setup Portable Shampooer
To set up the portable shampooer you have to attach the shampooer cap to the end of the portable sprayer. Now fill the jar with water to the water line. Then add Kirby carpet shampoo to the shampoo line. Use only Kirby carpet shampoo for best results. Screw the jar and portable sprayer tightly together.
Connect the sprayer to the attachment hose and be sure your Sentria is set up as a blower. The attachment hose should be connected to the air exhaust port and the air intake guard should be installed on the front of the unit. Turn the Sentria on and pull the trigger to spray suds onto the surface being cleaned.
Adjust the portable sprayer for proper suds volume by turning the spray adjustment control located on the trigger. Work suds into the surface until they disappear. Allow the surface to dry completely and vacuum to remove the dry residue, which contains debris and loosen dirt. To purchase additional Kirby carpet shampoo have a look at Amazon.
Sentria Optional Accessories
This section explains several optional Sentria accessories that will enhance the usefulness of your Sentria. These include:
Carpet Shampoo System Assembly
The carpet shampoo system was designed to help you shampoo and otherwise maintain carpeting. It contains the shampoo system nozzle, tray assembly, system hose, brush roll, tank and a bottle of Kirby carpet shampoo. Before shampooing, vacuum the carpeted area thoroughly to remove any loose dirt. Then unplug the Sentria. Make sure the nozzle is at its highest setting. Turn the belt lifter to the left or counterclockwise until the red arrows lineup. Release the lock and remove the nozzle.
Release the top of the bag assembly and remove the Mini Em-Tor. Pull the shampooer belt up away from the brush. Make sure the green arrows on the shampoo system nozzle are lined up. Slide the carpet shampoo system nozzle onto the shampoo tray.
Turn the belt lifter to the left until the red arrows lineup. The belt lifter hook will now catch and stretch the belt. Slide the nozzle trigger assembly towards the Sentria and place the hooks on the bottom rear of the nozzle, onto the attaching bar. Push the nozzle up against the Sentria and lock the nozzle in place. Turn the belt lifter to the right until the green arrows lineup and lower the headlight hood.
Filling the Shampoo System Tank
The shampoo system tank should be filled or emptied over a sink in case of spillage. Unscrew the large cup from the top of the tank. With the tank level, fill to the first line for small rooms, the second line for medium sized rooms, or the third line for large rooms.
Fill with warm water, not hot. Then add Kirby carpet shampoo. Use one cupful for small rooms, two cupful for medium sized rooms and three cupful for large rooms. Note that using more than the appropriate number of cupfuls could cause over-foaming.
Now replace the large cup into the opening on the top of the tank. Larger carpets may require emptying the tray and refilling the tank. One tank full of this solution should clean an area about 9 by 12 feet. To attach the tank, match up the lines on the tank and the exhaust port.
Slide the tank down and rotate it towards the Sentria. The hose has a light and dark end. Insert the dark end firmly into the tray hole. Then attach the light end to the tank. Lower the nozzle to its lowest setting. Turn the suds control valve right or clockwise for more suds. Turning the valve to the off position will stop the flow of suds completely.
Start with the suds control valve on. Plug the Sentria into the wall outlet. Turn the vacuum on and engage tech drive. Suds flow should begin immediately. As you move the Sentria forward foam will be released and the brush will work it into the carpet. Pulling the Sentria back into the same path should dispense suds for the full width of the tray. If not, move the Sentria more slowly or clean the shampoo tank filter if necessary. To shampoo along edges, make sure the tank is on the opposite side of the edge being cleaned.
Once the surface being clean and it has been covered with a blanket of foam. Turn the suds control valve off and go over the entire area again. After allowing the surface to dry completely you have to attach the power nozzle and vacuum the dried suds residue. The Sentria carpet shampoo system when used with Kirby carpet shampoo according to directions, has been tested safe on treated carpeting and will not affect the stain resistant properties.
Cleaning the Carpet Shampoo System
To clean the carpet shampoo system you have to raise the nozzle and unplug the Sentria from the wall outlet. Raise the headlight hood and pull the hose from the shampoo tray. Turn the belt lifter to the left until the red arrows lineup. Release the lifter to the right until the green arrows lineup.
Pull the tray and nozzle apart. Disconnect the shield by gently pulling out the ends of the tray just behind the brush roll. Remove the brush roll by simultaneously pushing on both ends of the tray. Now rinse the tray and rinse the shield. Finally rinse the brush. Remove any lint from the brush tufts. Shake excess water from the brush roll by brushing your hand over the bristles. Rinse the nozzle and at the end dry all parts with a towel.
Cleaning the tank
To clean the tank you have to remove the sponge filter. Rinse both thoroughly with cold water. Then rinse the hose and pour out the remaining carpet shampoo solution and rinse the shampoo tank. Rinse the suds screen on the bottom of the tank. When clean and dry you have to replace them to their original position.
Floor Care System
Your Sentria can be used as an effective floor care system for cleaning, waxing or buffing a variety of hard surface floors. To clean hard surface floors you have to make sure your Sentria is off and unplugged. The raise the headlight hood. To disengage the brush roll you have to turn the belt lifter to the left until the red arrows lineup.
Make sure the nozzle is set to its highest setting. Now attach the hard floor pad. Finally plug the Sentria again. Lower the power nozzle until the brushes contact the floor. Make sure tech drive is in neutral and turn the Sentria on. You’re ready to clean any hard surface floor. Heavily soiled floors may need additional cleaning such as damp mopping.
Buffer Nozzle
Your Sentria it can also be used to wax hard surface floors. But before applying wax you first have to attach the buffer nozzle to the vacuum. Make sure the nozzle is at its highest setting and unplug the Sentria from the wall outlet. Also you have to remove the power nozzle.
Then drop the buffer nozzle onto the floor buffer brush. Push the belt up against the brush roll with your finger. While holding the belt in place you have to turn the belt lifter to the left or counter clockwise until the red arrows lineup. The belt lifter hook will catch the belt and stretch it upward into the nozzle.
Now attach the nozzle and turn the belt lifter to the right or clockwise until the green arrows lineup. Finally you have to lower the headlight hood. Make sure tech drive is in neutral by stepping on the “N” side of the power assist paddle. Your Sentria is now ready for use as a buffer.
Sentria Wax Roller
To wax hard floors, assemble the roller wax applicator by pushing the two halves together until the spring loaded pin clicks into place. Remove the wax roller from the canister. Insert the applicator into the open end of the wax roller. Pull the roller bag off the wax roller and save the packing bag.
Use the roller to apply a small amount of Kirby miracle wax. It is not necessary to cover the entire floor completely. To remove the wax roller from the handle you have to push the wax roller into the packing bag. Grasp both the packing bag and roller firmly. Push the roller away from you to compress the retaining spring and pull the roller off the bar.
Seal the bag to prevent premature drying and store it in a safe place away from kids and pets. For easier storage you can disconnect the roller handle by pressing down the spring loaded pen and pulling the two ends apart. Then spread the wax with the floor buffer.
First make sure tech drive is in neutral. Before you turn the Sentria on you have to grasp it firmly by the handle. The floor buffer tends to move forward when the vacuum is on and the brushes are in contact with the floor.
Waxing Floors with the Sentria
Turn the Sentria on and lower the brush as far as the toe touch control will allow. To spread the wax, move the Sentria over the floor as though you were cleaning a carpet, using slow steady strokes. Now wait 5 minutes. When dry, buff to a bright sheen.
For marble floors you can use the same procedures, but buff immediately to avoid any drying time. Hard floors may be rebuffed anytime it’s necessary. Waxing is not necessary every time you buff. Apply additional wax when rebuffing does not produce desired results.
Do not stand the Sentria up on end for polishing. Make sure tech drive is in neutral for polishing. Do not use Kirby miracle wax on rubber or asphalt tiles.
Sentria Carpet Fluffer
Your Sentria floor buffer can also be used as a carpet fluffer. To reset the nap on a matted down carpet. Before placing this Sentria on the carpet make sure tech drive is in neutral and the nozzle is all the way up. Now plug in the power cord.
Holding on to the handle firmly, start the Sentria and lower the nozzle one notch at a time until the brush hits the floor. Move the Sentria back and forth over the carpet. Lowering the brush too far may cause certain carpet types to fuzz. For that reason use of the carpet fluffer is not recommended for delicate carpets.
Turbo Accessory System
The turbo accessory system can be used for a wide variety of household jobs. It is a sander, a buffing unit and a scouring unit. To use the turbo accessory as a polisher you have to attach the synthetic lamb’s wool pad and use it for polishing hard wax services, such as table tops, paneling and large flat surfaces.
The dust shroud is not used one polishing. Attached the web nylon scouring pad and the turbo accessory now becomes a scouring tool. Use it for scouring hard surfaces. The dust shroud is not used with the scouring pad. For safety reasons do not turbo scour painted surfaces.
Kirby Sentria as a Sander
When using the turbo accessory system as a sander it is always advisable to use safety glasses. To begin, unsnap the sander dust shroud at the rear of the tool and lift it off. Select the correct grade of sandpaper needed for the job. Fine paper for a smooth finish or course paper to clean rough surfaces or remove paint.
With the turbo accessory on a level surface, wrap the dust shroud around the sander with the opening to the rear and snap it shut. Be sure no metal objects such as nails are sticking up from the surface to be sanded. They could damage the turbo accessory or cause sparks which could ignite dust.
Insert the attachment hose into the end of the turbo accessory. Turn the Sentria on. Press the “on” button on top of the sander and grip the Sander at the front and rear. While applying light pressure, move the sander over the surface slowly allowing it to do the work.
Don’t force it or lean heavily on it, that will only slow it down and the tool works best at high speeds. Replace the disposable filter bag after extended sanding, because the dust is fine and intends to plug the pores of the back.
Using the Sentria Zip Brush
When connected to the attachment hose the zip brush can be used for a wide variety of cleaning jobs. Including carpeted steps, upholstery or in the car. For best results avoid pressing down heavily on the zip brush. Allow the brush to rotate at maximum speed by gently moving it side to side on the service being cleaned.
To avoid injury do not insert fingers into the revolving brush area or push the release button while the brushes in motion. Keep the brush flat against the surface being cleaned. The brush can also throw particles outward. Avoid using the zip brush on delicate fabrics. To clean the zip brush you have to remove it from the hose.
Then use the hose to clean any lint from the brush. Press the button on the front of the brush to release the outer brush ring. Lift the center brush air turbine out of the tool and remove any particles or lint. Remove any particles left in the tool cavity.
Place the brush air turbine back into the tool and turn it until the tabs drop into the slots. Hook the tab on the rear of the ring brush onto the small opening of the tool and snap it back into place.
Maintenance Tips
The Sentria is a highly sophisticated home care system. As with most modern appliances it requires a modest degree of routine maintenance to keep it operating efficiently. This section presents a few maintenance tips on the Sentria. Such as:
Replacing the Power Nozzle Belt
After extended use, the power nozzle belt on your Sentria may become stretched or worn causing the belt to slip. If this condition exists simply replace the belt with a new Kirby belt. To change the belt, remove the nozzle from the Sentria.
Then release the belt tension by turning the belt lifter to the right or clockwise until the green arrows lineup. Unlock the rug plate by unhooking the two latches on the rear of the nozzle. Note if there are one, two or three notches exposed on the end of the brush roll. Lift out the belt and brush roll. Slide off the old belt and replace it with a new Kirby belt. Place the belt and brush roll back into the nozzle. Then center the belt on the brush.
Replace the rug plate and then latch the two locks that hold it in place. Turn the belt lifter to the left or counter clockwise until the red arrows line up. This will stretch the belt inside the nozzle. Now you are ready to re-attach the power nozzle and re-engage the belt.
Brush Roll Replacement
Over time the bristles on the brush roll will wear. You will need to adjust the brush roll height. First remove the power nozzle from the Sentria by turning the belt lifter to the left until the red arrows lineup. Then release the belt tension by turning the belt lifter back to the right or clockwise until the green arrows line up.
Unlock the two latches on the rear of the power nozzle to remove the rug plate. Note if there are one, two or three notches exposed on the ends of the brush. To adjust you have to lift the brush out of the nozzle. Rotate both ends to the desired setting. If the brush roll was already set to three notches then you will need to replace the brush roll. Place the brush back into the nozzle and make sure both ends are set to the same number of notches.
Replace the rug plate by placing it on the front of the bumper first and then pulling it over the bumper on the rear of the power nozzle. Secure to two rug plate latches. Then turn the belt lifter to the left or counterclockwise until the red arrows lineup. The nozzle can now be attached to the Sentria.
Electric Cord
A functional electric cord is essential for safe operation of your Sentria. Be careful not to run over the cord and always unplug your vacuum by grasping the plug rather than yanking on the cord. If the electrical cord connecting the Sentria to the outlet becomes cut or frayed, do not use the Kirby vacuum cleaner.
Contact your authorized Kirby service center immediately for replacement. If the motor doesn’t run when you turn your Sentria on make sure the power cord is plugged in. Check your breaker or fuse box to make sure the outlet has power. Look for breaks in the court insulation.
If the cord is damaged replace it with a genuine Kirby power cord. Do not attempt to repair damaged electrical cords. Make sure all accessories and other attachments are properly mounted on the front.
Kirby Sentria Parts and Accessories
The Sentria will not operate unless a bag assembly, attachment hose or shampoo tank is properly attached to the exhaust port. Any of these items must firmly click into place for the Sentria to operate. If your Sentria isn’t picking up dirt or lint from your carpeting then you have to make sure the nozzle height is adjusted properly.
Lower the nozzle until you hear a change in motor tone. Then lower it one more notch. Improper height adjustment will affect airflow. Check the bag to see if it’s full. If it is you have to change it. If it’s still not picking up dirt and lint the brush roll may need to be adjusted to a different height.
If the brush roll is not turning freely, the belt may be slipping, broken or not on the motor pulley. Replace the belt with a new Kirby belt. Or another cure might be to replace the old brush roll with a new brush roll.
The exciting versatility of a complete home care system. The durability of aluminum and the simplicity of easy adjustments and accessories. The reliability of an international company known for its quality products. The Sentria puts it all at your fingertips.
Everything you need to clean practically every surface, every corner. Would you like to purchase the Sentria? Have a look on Amazon. Would you like to purchase parts and accessories? Have a look at the information sections below.
Related Post: Are Kirby Vacuum Cleaners Worth the Money?
About Kirby
Everyone has heard of Kirby vacuums sooner or later in their life. When you want a good vacuum you cannot go wrong with these vacuum cleaners. The founder of the Kirby company, which is the manufacturer of these vacuums, is Jim Kirby. He invented the vacuums to help reduce the time and hard work it took to clean house. His first vacuum cleaner was invented in 1907.
The first vacuum that was made with the Kirby name was made in 1935. It was the Kirby Model C. These vacuums had a toe touch on / off switch and there was a belt driven brush roll that helped enhance on how well these vacuum cleaners worked. Since this model was made there have been many other units of vacuum cleaners that have been made.
There are many a variety of units that you’ll want to look at but there’s one model that is more favored than any others. This is the Kirby Sentria model. The main reason this is so favored is because there are 12 separate machines in one simple-to-use unit. This makes cleaning any part in your house a piece of cake.
Now this model is not cheap and it is in the high end for price ranges. Though if you’re searching for one vacuum cleaner that will do all of the cleaning tasks you need then you cannot go wrong with these. They include many different features and other things that make this the best vacuum for almost any home owner to have.
Thus, where do you find the Kirby vacuums? The best place to find these vacuum cleaners is to go online. You’ll be able to find all kinds of sites that sell these great vacuums. You want to take the time to do your schoolwork on these cleaners because you must make sure that they’re exactly what you need.
Thus, make a list of the things you want to clean around your home that requires a vacuum cleaner. This will help you figure out if the Kirby vacuums are exactly what you need. These vacuums will not be for everyone given that they are not the most affordable model available.
Thus, know your financial budget and your cleaning needs before you start shopping around. This will make it a lot easier for you to make a decision about whether or not to get the Kirby vacuums. Just remember to take your time when deciding.

If you have any questions or comments, please add them below in the comment section. Similarly, please let us know if you spot any mistakes or omissions. Thanks!
Last Update: 2024-05-01 | Affiliate links/Images from Amazon Product Advertising API