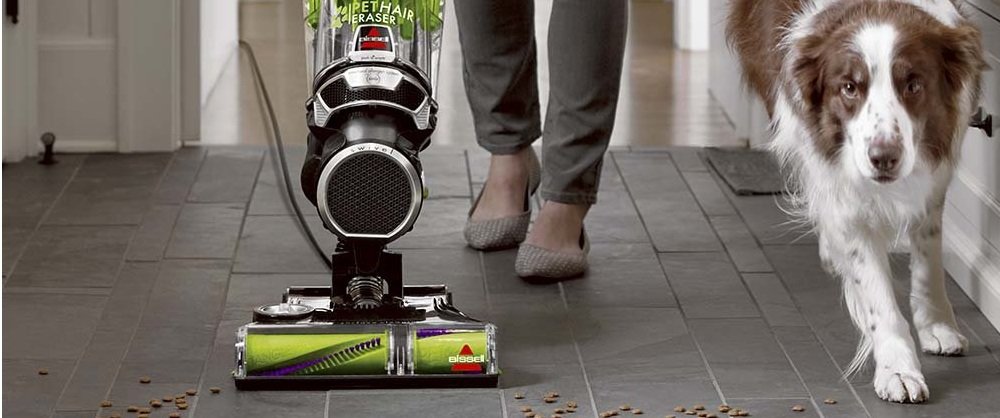
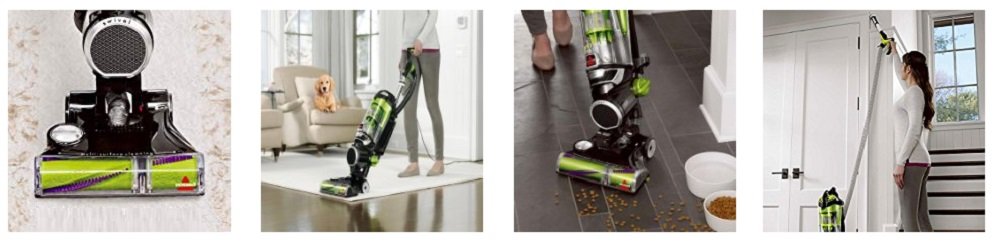
Whether it is shedding season for your dog or cat, the Bissell Pet Hair Eraser 1650A Upright Vacuum is designed to make cleaning up after pets a breeze.
Features
The Pet Hair Eraser comes with an option for a “grease filter” to refresh your home. Press the tank release button and pull it away from the vacuum and pull the tap out of the container. Remove the yellow foam filter and replace it with the black filter.
Your Bissell 1650A Pet Hair Eraser comes with a unique 2-in-1 tool which is attached right to the handle. Press the handle release and pull the handle up and out to use the soft bristles for gentle cleaning. Getting dust and pet hair off your lamp shades. Flip the tool around to use the rubber knobs to get out the most of stubborn pet hair. You can also disconnect the 2-in-1 brush tool and connect it to the end of the wand for delicate surfaces that are hard to reach. The 2-in-1 brush tool is just one of the many ways to get rid of pet hair using the Pet Hair Eraser.
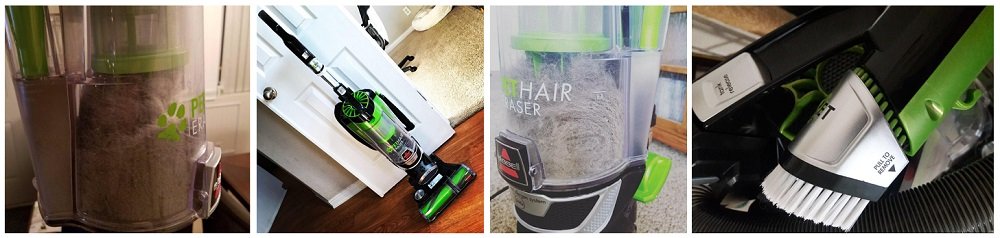
Emptying the Dirt Tank
Emptying the dirt tank on your Bissell 1650A Pet Hair Eraser is easy. You know your tank is filled when it reaches the full line. Press the tank release button and lift the dirt tank over a trash bin. Press the tank empty button and watch the ball of hair drop right out. If needed you can twist counterclockwise to remove the separator. The separator can be rinsed under warm water if needed. Just make sure it is completely dry before replacing. When finished emptying, close the bottom lid shut. But the tank back on the machine, bottom first and click into place. It’s that quick and easy to empty your tank with the Pet Hair Eraser.
3 Ways to Use Tools
There are multiple ways you can use your tools with the Pet Hair Eraser. Attach any tool to the hose for flexible and close up cleaning. Putting a tool on a wand will help you to reach hard to reach spots. Attaching tools is especially helpful on stairs. Attaching to the handle will help you get closer to your mess, without having to hold the tool for cleaning. Now that you know the functions you can start using your tools.
Vacuum Suction Knob
If your Bissell 1650A Pet Hair Eraser is not picking up messes, it could be a simple fix. Make sure the vacuum suction knob is turned towards the part of the vacuum you want to use. To vacuum the floor, you have to turn the knob, so it’s pointing to floor suction mode. If you want to use your tools with the handle, hose or wand you have to turn the knob pointing to “hose tool suction”. Choosing where you want suction will allow you to use your Bissell Pet Hair Eraser properly.
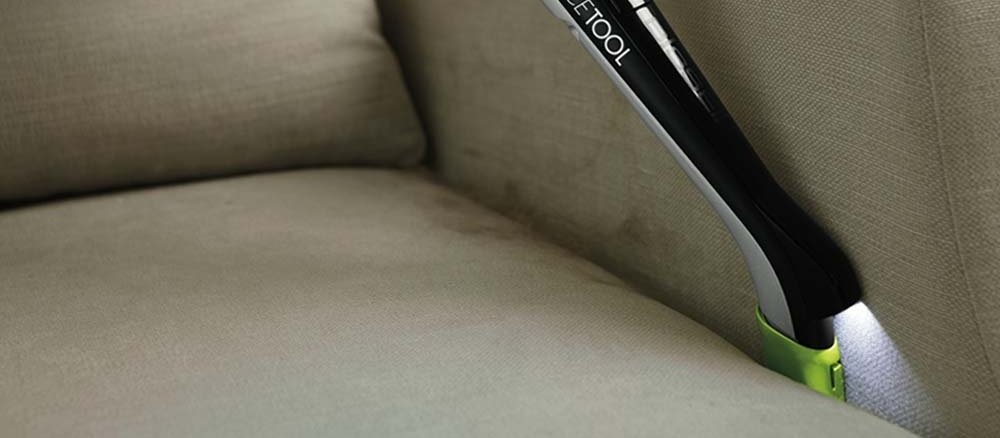
LED Lighted Crevice Tool
Your Bissell 1650A Pet Hair Eraser comes with a handy LED lighted crevice tool. For those dark hard to reach spots this tool will light your path. But first, let’s show you how to get it working. Connect your lighted crevice tool to the handle, wand or hose. The LED light will turn on automatically. If your LED light goes out, you will need to change the batteries. To change the batteries, you need a head screwdriver. Unscrew the small screw and pull the cover off. Revealing the two batteries. We hope you enjoyed getting familiar with you LED lighted crevice tool.
Scoop & Sweep
Your Scoop & Sweep tool is all in the name, and we will describe to you why. Attach the Scoop & Sweep to the end of the wand. The scoop features a wide suction path that leads the mess straight into the vacuum. It is a great tool for pet and kid messes. You can use the brush attachment to quickly sweep up the mess into the tool for dustpan style pickups. Now that you are familiar with the Scoop & Sweep tool you are ready to clean.
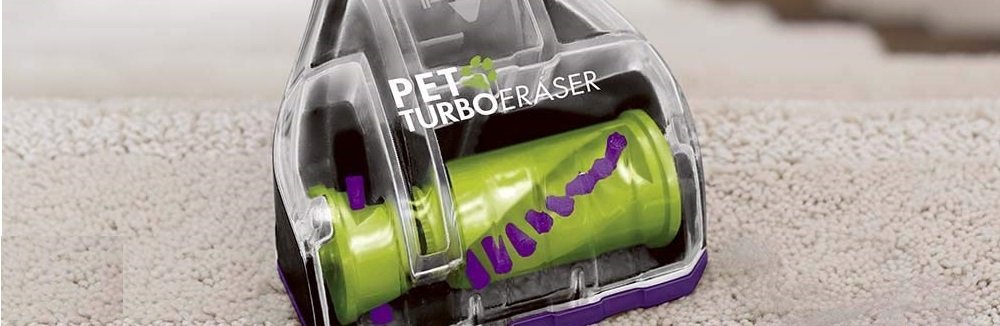
TurboEraser Tool
The Bissell Pet Hair Eraser comes with a unique set of tools. The pet TurboEraser provides portability for help with different areas of your home. For example, picking up pet hair on your stairs. For couches and pillows, this tool also has you covered. The TurboEraser tool is just another way to tackle messes with your Bissel Pet Hair Eraser.

TurboEraser Maintenance
In this section, we will explain to you how to maintain your TurboEraser tool. To get inside, twist the collar counterclockwise and then remove the top. You will see all the moving parts. Now remove any buildup or hair on the brush and inspect the belt for damage. Put it back together by placing the belt back onto the brush roll. Now thread the belt around the small gear. Slide the brush roll with the belt back in.
Hooking the front end first, the top will go on last. Align the tap on the top of the cover and then twist the collar back into place. Maintaining your TurboEraser tool is easy. For parts, please have a look at the end of this post.

Brush Roll Safety Feature
The Bissell 1650A Pet Hair Eraser includes a brush roll safety feature, to warn users about proper height adjustment or debris clogged into the brush roll. If the light turns red around the height adjustment knob, your brush roll safety feature has been activated. To fix, place your Pet Hair Eraser in the upright position and turn the power switch off.
Vacuuming premium soft carpet might be a reason why the red indicator is on. Turn the height adjustment knob to the high carpet setting. Also, make sure that your brush roll is clear of any large debris that may clog the system. Now turn on your Pet Hair Eraser. The light indicator should now be blue.
Changing the Brush & Belt
If your Bissell 1650A Pet Hair Eraser runs into issues picking up debris, it could be time for a brush and belt change. Before we start, you will need a head screwdriver. To start, unplug your machine. Place the vacuum back onto its front to see underneath it. Now unscrew the nine screws to remove the cover. Pull the roller straight out and slide the belt off the motor if needed. To inspect the brush roll, set it on its end and spin it by flicking it once. If it doesn’t spin freely, it is time to replace your brush roll.
Now inspect your belt. If it is broken or damaged, it will need to be replaced. Reassemble by placing the belt back on the brush roll. Then pinch the belt and hook it back around the silver motor gear. Line up the end caps of the brush roll and put them into place. When the brush roll is in, you have to turn it to align the belt. Re-attach the cover and reinsert the nine screws. You are now ready to clean with your Pet Hair Eraser.
Clogged or Not Picking Up Dirt
Your Bissell 1650A Pet Hair Eraser could be clogged or not set correctly for picking up dirt and debris. In this section, we have some tips to fix that. Check to make sure the vacuum suction knob is turned towards the floor suction. Then turn your power switch to “Off”. There could be large debris clogging the brush roll. Remove the debris to help brush roll rotation. Your container may not be placed properly, or it may be full. Empty the dirt container over a trash bin by pressing the “Empty” button.
Check your hose for any cracks or holes that can cause loss of suction. Then replace the tank correctly until it clicks. The main hose needs to be connected as well. Push the hose end firmly to secure the latch. You may also have a clog in the lower hose. Pull down and add an angle to disconnect. These few quick tips should get your Pet Hair Eraser back to cleaning.
Related Bissell Vacuum Articles
• Best Bissell Upright Vacuums
• Best Bissell Vacuums for Pet Hair
Comparison Articles
• Bissell 9595A vs. Shark Navigator NV356E
• Bissell Zing 4122 vs. 2156A Canisters
Bissell 1650a Pet Hair Eraser Infographic


If you have any questions or comments, please add them below in the comment section. Similarly, please let us know if you spot any mistakes or omissions. Thanks!