Coffee Grind Size Explained: A Chart for Every Brewer and How to Dial In Espresso
Grind size is the most powerful and most frustrating variable in coffee. Change it, and you change surface area, flow, extraction and even how much coffee you waste. I've spent years dialing in grinders for everything from French press to espresso. Here's how grind size really works, which grind each brewer needs, and a simple system for getting espresso right without losing your mind.
We choose products independently. We may earn a commission through links on this page; your price stays the same. Affiliate policy
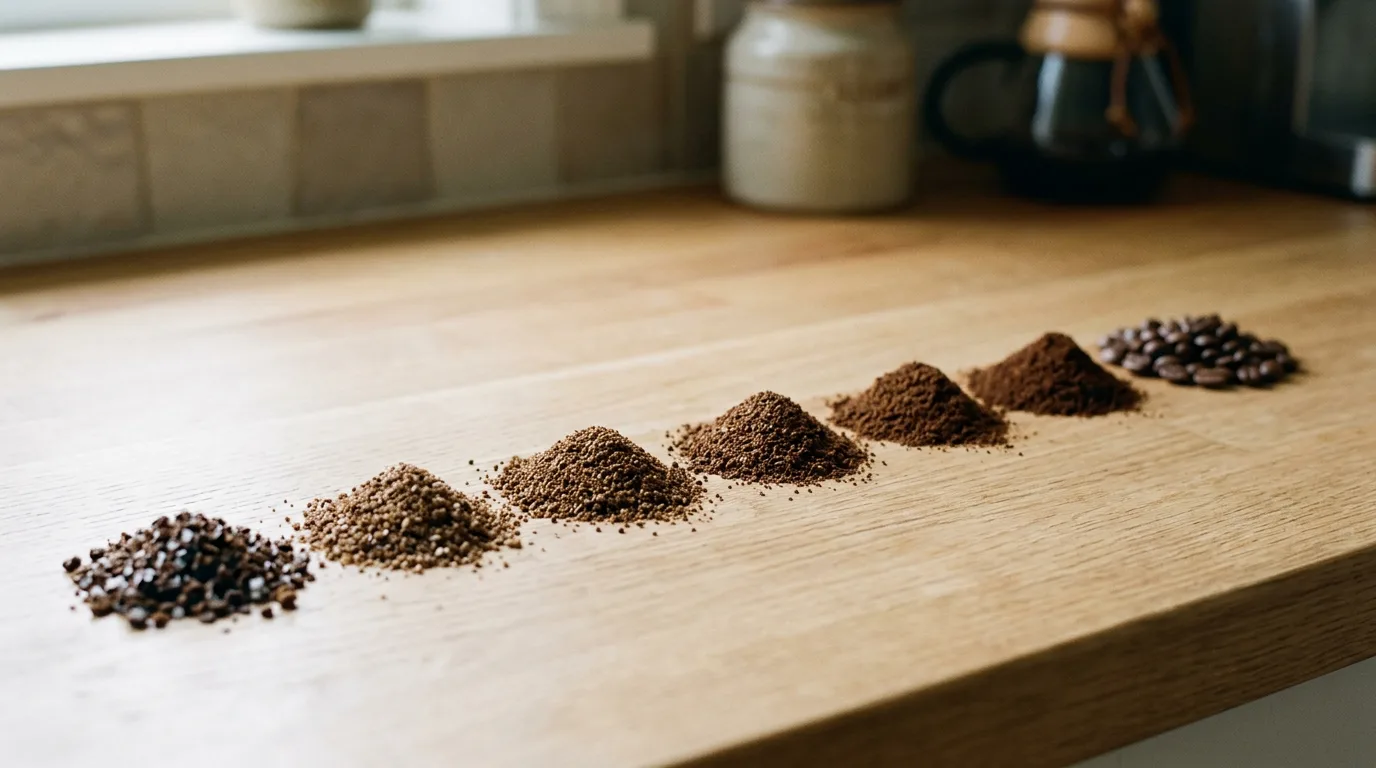
Match grind size to brew time: the longer the water touches the coffee, the coarser the grind. French press and cold brew use a coarse grind, drip and pour-over a medium to medium-fine grind, and espresso a fine grind. Finer grinds extract faster and slow the water down; coarser grinds extract slower and let it flow. For espresso, use the grinder to get close, then fine-tune with dose and yield. Change one thing at a time, and always purge the grinder after adjusting it.
Why grind size matters so much
Coffee quality depends on several variables: the beans, the water, the ratio of coffee to water, the temperature, the brew time and the grind. Of all of them, grind size has the biggest effect on what ends up in the cup.
It's also the variable people struggle with most. I've lost count of the mornings I spent turning a grinder dial back and forth, chasing a shot that tasted right yesterday.
Grind size is also the variable that ties all the others together. Temperature, ratio and brew time only work as intended if the grind lets water and coffee meet in the right way. Get the grind wrong, and no amount of tweaking elsewhere will fully rescue the cup.
Over the years I have used blade grinders, cheap burr grinders, hand grinders and several dedicated espresso grinders. Each one taught me something about how particle size shapes flavor, and most of my best cups came right after I finally understood what my grinder was doing.
In this guide, I will start with the basics that apply to every brewer, then move to the specific challenges of espresso, and finish with practical troubleshooting you can use tomorrow morning.
The good news: once you understand what grind size actually changes, it becomes much easier to control. This guide covers every brewing method, then goes deep on espresso, where grind is most demanding.
Coffee grind size chart
Use this as a starting point, then adjust by taste. Every grinder's numbers are different, so describe grind by texture, not dial setting.
| Grind | Feels like | Best for | Typical contact time |
|---|---|---|---|
| Extra coarse | Peppercorns | Cold brew | 12-24 hours |
| Coarse | Sea salt | French press, percolator | 4-5 minutes |
| Medium-coarse | Rough sand | Chemex, clever dripper | 4-5 minutes |
| Medium | Regular sand | Drip machines, flat-bottom drippers | 4-6 minutes |
| Medium-fine | Table salt | Cone pour-over, AeroPress | 2-3.5 minutes |
| Fine | Fine sand, powdered sugar edge | Espresso, moka pot (a bit coarser) | 25-30 seconds |
| Extra fine | Flour | Turkish coffee | Boiled briefly |
The pattern is simple: the shorter the contact between water and coffee, the finer you grind. Fine grinds expose more surface area so extraction can happen quickly.
How to describe grind size
Grinder numbers don't translate between machines. Setting 15 on one grinder can be espresso-fine, while on another it's pour-over coarse. Even two grinders of the same model can differ slightly.
That's why I describe grind by touch and sight. Rub a pinch between your fingers: coarse grounds feel like distinct grains, medium feels like sand, and espresso grounds feel soft and slightly clumpy.
Recipes online often give microns or grinder settings. Treat them as a rough guide, then trust your cup.
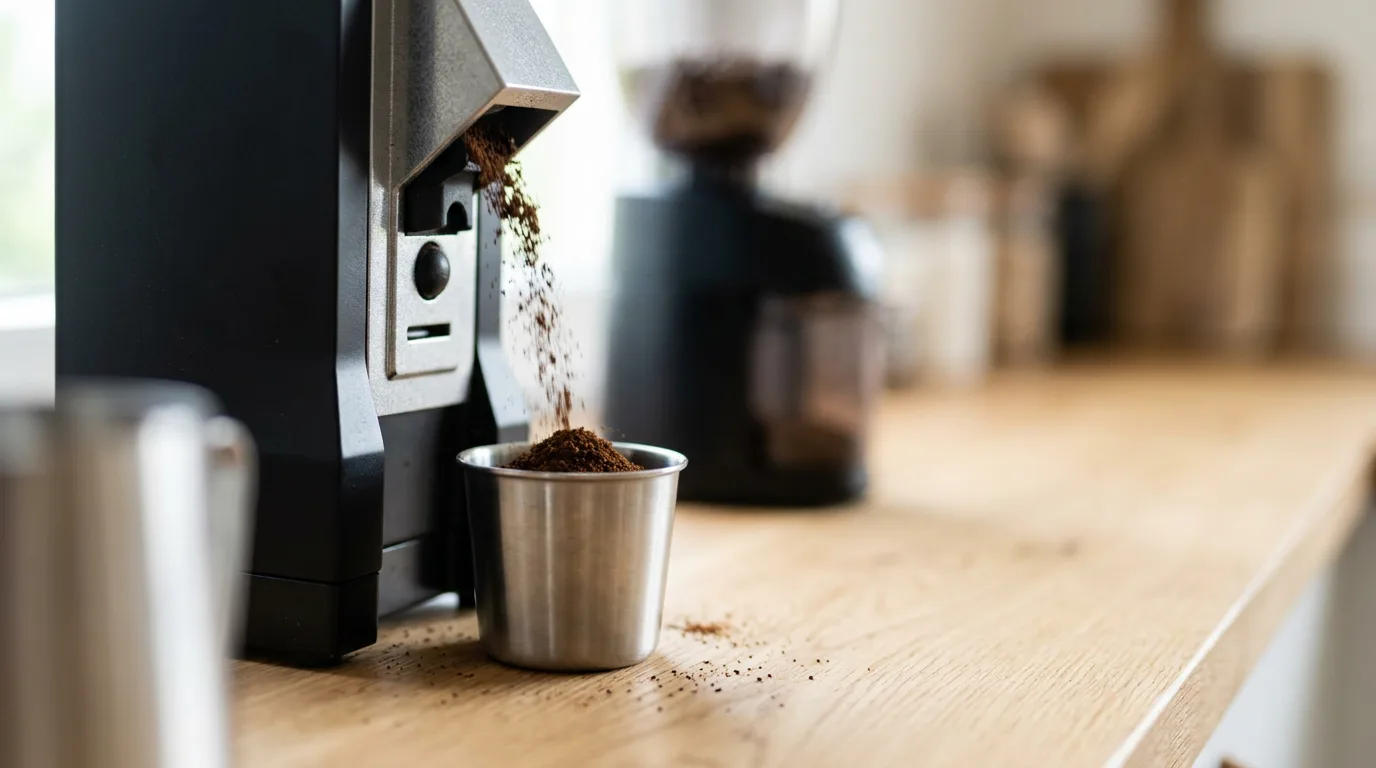
How to check your grind by eye and touch
You don't need lab equipment to judge a grind. A few simple checks tell you a lot.
- Spread it out. Tip a spoonful onto a white plate or sheet of paper. A good grind looks even; a poor one shows obvious chunks and dust.
- Rub it. Pinch a little between your fingers. Coarse grounds feel like separate grains, medium like sand, espresso like soft powder that holds a faint print.
- Compare with a reference. Keep a small jar of a grind you know works, and compare new settings against it.
- Watch the brew. Drawdown time in a pour-over and flow in espresso are the most honest grind checks of all.
After a while, you'll recognize the right grind for each method at a glance, just as you'd recognize the right consistency for a sauce.
Grind size changes surface area and extraction
The first thing a grind change does is alter the total surface area of the coffee.
Grind finer and you split the beans into more, smaller pieces. More surface is exposed to water, so flavor compounds dissolve faster. Grind coarser and there's less surface, so extraction slows.
That's why a fine grind in a long brew tastes harsh and bitter, and a coarse grind in a short brew tastes sour and weak. The grind has to match the time the water has to work.
If you want the chemistry behind this, my guide to coffee extraction explains which compounds come out first and why.
Grind size changes flow and resistance
The second effect is less obvious. Changing particle size changes how the grounds pack together.
Fine particles pack tightly, leaving small gaps. Water has to work harder to get through, so it flows more slowly. Coarse particles leave bigger gaps, so water passes quickly.
In a pour-over, a finer grind means a slower drawdown and a longer brew. In espresso, a finer grind means more resistance against the pump, which slows the shot and increases contact time.
So one turn of the dial changes two things at once: how fast coffee extracts and how long the water stays in contact. That double effect is a big part of why grind adjustments can feel unpredictable.
A short history of grinding coffee
For centuries, coffee was ground by hand. Early drinkers pounded roasted beans with a mortar and pestle, producing a very uneven mix of powder and pieces.
Hand mills with grinding plates appeared in the Ottoman world and spread through Europe, giving the extra fine powder used for Turkish coffee. Later came the familiar box mills with a crank on top, a fixture of kitchens for generations.
Electric grinders arrived in the twentieth century, first in shops and cafés, then in homes. Cheap blade grinders made home grinding common, while burr grinders, once mostly commercial, gradually became affordable.
Espresso pushed grinder design forward more than anything. Its need for a fine, consistent grind drove precise burrs, micro-adjustment and, more recently, low-retention single-dose grinders built for home baristas.
Today, home grinders can match café quality, which is a big reason home coffee has improved so dramatically.
Grind, contact time and brewing method
Every brewing method falls into one of three families, and each has its own relationship with grind size.
Immersion: French press, cold brew, clever dripper
Coffee steeps in water for a set time. Because contact time is fixed by you, not by flow, a coarse grind works best. It extracts slowly and evenly and is easy to filter out.
Percolation: drip, pour-over, Chemex
Water flows through a bed of coffee. Here, grind controls both extraction speed and how long the water takes to drain, so medium to medium-fine grinds are the sweet spot.
Pressure: espresso, moka pot, AeroPress
Pressure forces water through quickly, so a fine grind is needed to extract enough in a short time and to create resistance against the pressure.
Typical contact time by method (relative)
If you're comparing brewers, my overview of coffee brewing methods walks through each one.
Grind size by brewing method, in detail
Cold brew: extra coarse
Cold water extracts slowly, and cold brew steeps for 12 to 24 hours. An extra coarse grind keeps it from turning bitter and makes filtering much easier. Finer grinds make cold brew muddy and hard to strain.
French press: coarse
A coarse grind suits the four-minute steep and keeps grounds from slipping through the metal mesh. If your press coffee is gritty or bitter, go coarser. If it's thin and sour, go a little finer or steep longer.
Chemex: medium-coarse
Thick bonded filters slow the flow, so a Chemex needs a slightly coarser grind than other pour-overs. Too fine, and the brew stalls and turns bitter.
Drip machines: medium
Most drip machines like a medium grind, like regular sand. Flat-bottom baskets often prefer slightly coarser; cone baskets slightly finer.
Cone pour-over: medium-fine
Fast-draining cones like the V60 need a medium-fine grind, like table salt, to slow the water enough for a 2.5 to 3.5 minute brew.
AeroPress: medium-fine to fine
The AeroPress is flexible. Medium-fine works for longer steeps; fine works for quick, espresso-style recipes. Just remember finer grinds make plunging harder.
Moka pot: fine, but coarser than espresso
A moka pot works at much lower pressure than an espresso machine. Grind fine, but not as fine as espresso, or the pot can choke and push water through unevenly.
Espresso: fine
Espresso needs the fine grind and precise adjustment covered in the rest of this guide.
Turkish coffee: extra fine
Turkish coffee uses a powder-fine grind that stays in the cup. Most home grinders can't go this fine; a dedicated Turkish hand mill is the traditional tool.
How grind works with temperature and ratio
Grind never works alone. It interacts with every other brewing variable.
Hotter water extracts faster, so a hotter brew can handle a slightly coarser grind. Cooler water extracts slower, so it often needs a slightly finer grind to reach the same balance.
The ratio matters too. More water relative to coffee means more extraction, which can partly make up for a coarse grind. Less water means less extraction, which can tame a grind that's a touch too fine.
That's why I recommend fixing temperature and ratio first, then adjusting grind. Once the grind is close, small changes to ratio are the gentlest way to fine-tune flavor.
Water quality matters as well. Very soft water can make coffee taste flat, and very hard water can mute flavors. My guide to water chemistry for coffee explains how to get it right.
Why uniformity matters as much as size
No grinder produces perfectly identical particles. Every grind contains a spread: some boulders larger than the target, and some fines, tiny dust-like particles.
Fines extract very quickly and can add bitterness and muddiness. Boulders extract slowly and can add sourness. The wider the spread, the harder it is to get a balanced cup.
That said, some fines are useful. In espresso, they add body and help build resistance in the puck. The goal isn't zero fines, but a consistent, predictable distribution.
This is where grinder quality shows. A good burr grinder gives a tighter, more consistent spread than a cheap one, and that consistency is what makes dialing in possible.
Burr vs blade grinders
A blade grinder chops beans with a spinning blade, like a small blender. The longer it runs, the finer it gets, but the result is always a mix of powder and chunks.
A burr grinder crushes beans between two burrs set a fixed distance apart. Particles can only leave once they're small enough, so the grind is far more uniform and repeatable.
For anything beyond basic drip coffee, a burr grinder is the single biggest upgrade you can make. For espresso, it's essential. My full guide to burr vs blade grinders explains the differences, and my comparison of hand vs electric grinders helps you choose one.
Our tip: If you can only afford one upgrade, buy a decent burr grinder before a new brewer. It improves every cup, whatever method you use.
Choosing a grinder for your method
The grinder you need depends on what you brew.
- Filter only: any decent burr grinder with medium settings works. Look for low fines and easy adjustment.
- Espresso only: you need an espresso-capable burr grinder with fine, ideally stepless or micro-stepped, adjustment.
- Both: choose a grinder that switches easily between ranges and returns accurately to your settings, or keep two grinders.
- Travel or tight budget: a good hand grinder offers excellent grind quality for the money.
Burr type plays a role. Conical burrs often give a heavier, more textured espresso, while flat burrs tend toward clarity. Both can make excellent coffee.
Why espresso grind settings are so hard
Espresso is where grind size gets truly demanding. There are three reasons it causes so much frustration.
- It changes surface areaFiner means faster extraction; coarser means slower. That alone changes the taste.
- It changes how the puck packsParticle size changes how tightly the coffee compresses, which changes resistance, flow rate and contact time all at once.
- It wastes coffeeMost grinders hold some coffee inside. After a change, the first grams out are still the old setting, so you need to purge them.
Put those together and every adjustment costs beans, time and patience. It's no wonder so many home baristas feel stuck.
Why espresso needs a fine grind
Despite the frustration, grinding fine is non-negotiable for espresso. The whole method depends on it.
Early espresso inventors wanted to brew coffee quickly, to order. They realized that brewing in seconds needed a very fine grind, but water won't flow through fine coffee by gravity alone. It needs to be pushed.
So they added pressure, first from steam, then from levers and pumps. That evolution led to today's standard of about 9 bar, roughly 130 psi.
The fine grind and the pressure work as a pair. The grind gives enough surface for fast extraction; the pressure forces water through the tightly packed puck.
If you're curious whether 9 bar is really necessary, my guide to espresso pressure: 6 bar vs 9 bar looks at what changes at lower pressure.
Channeling and puck integrity
At 130 psi, espresso depends on the coffee puck resisting the water evenly across its whole surface.
Water under that pressure is always looking for the easiest path. If one part of the puck is weaker, looser or thinner, water rushes through there. That's channeling.
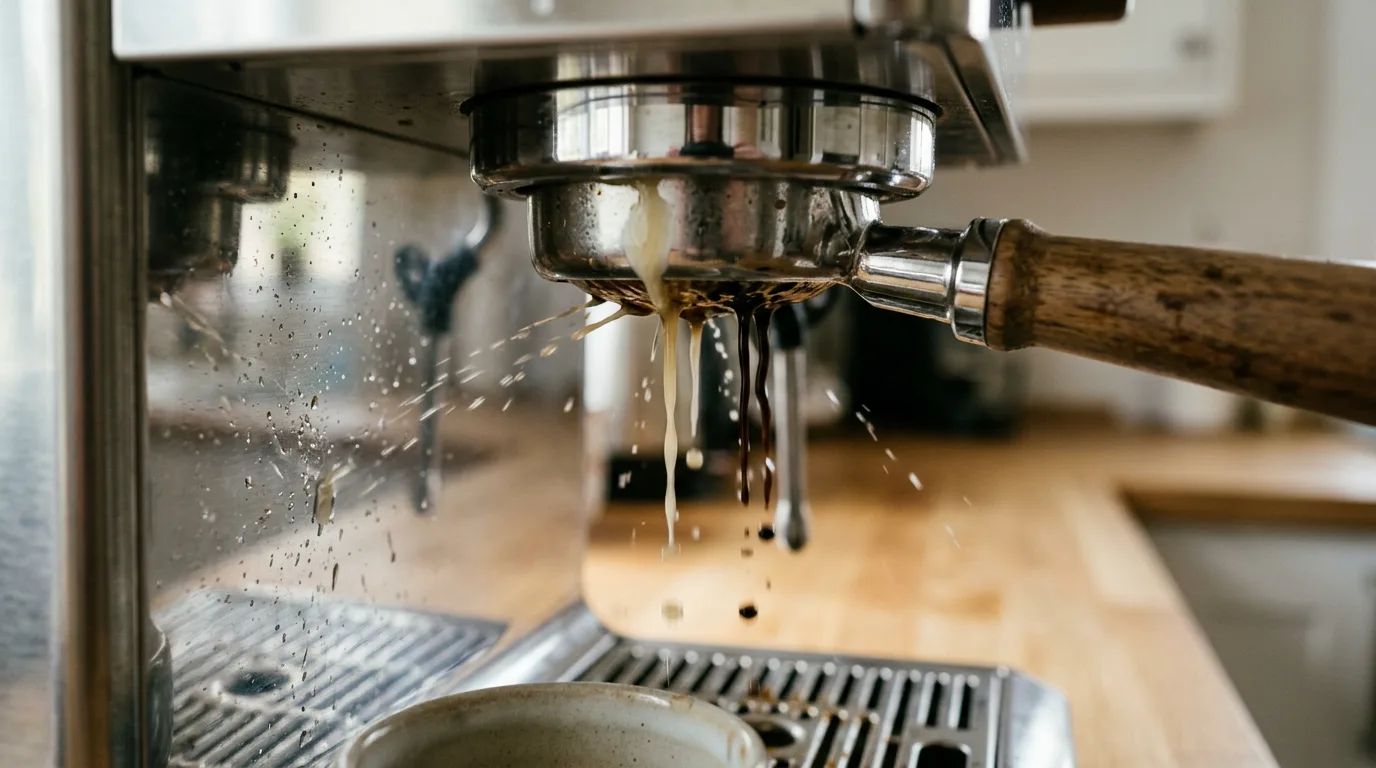
Grinding very fine increases the risk. The puck becomes so dense that small flaws turn into channels, and the water drills through them instead of passing evenly through the coffee.
Some channeling happens in almost every shot. But pushing the grind finer and finer eventually reaches a point where channeling dominates and the shot gets worse, not better.
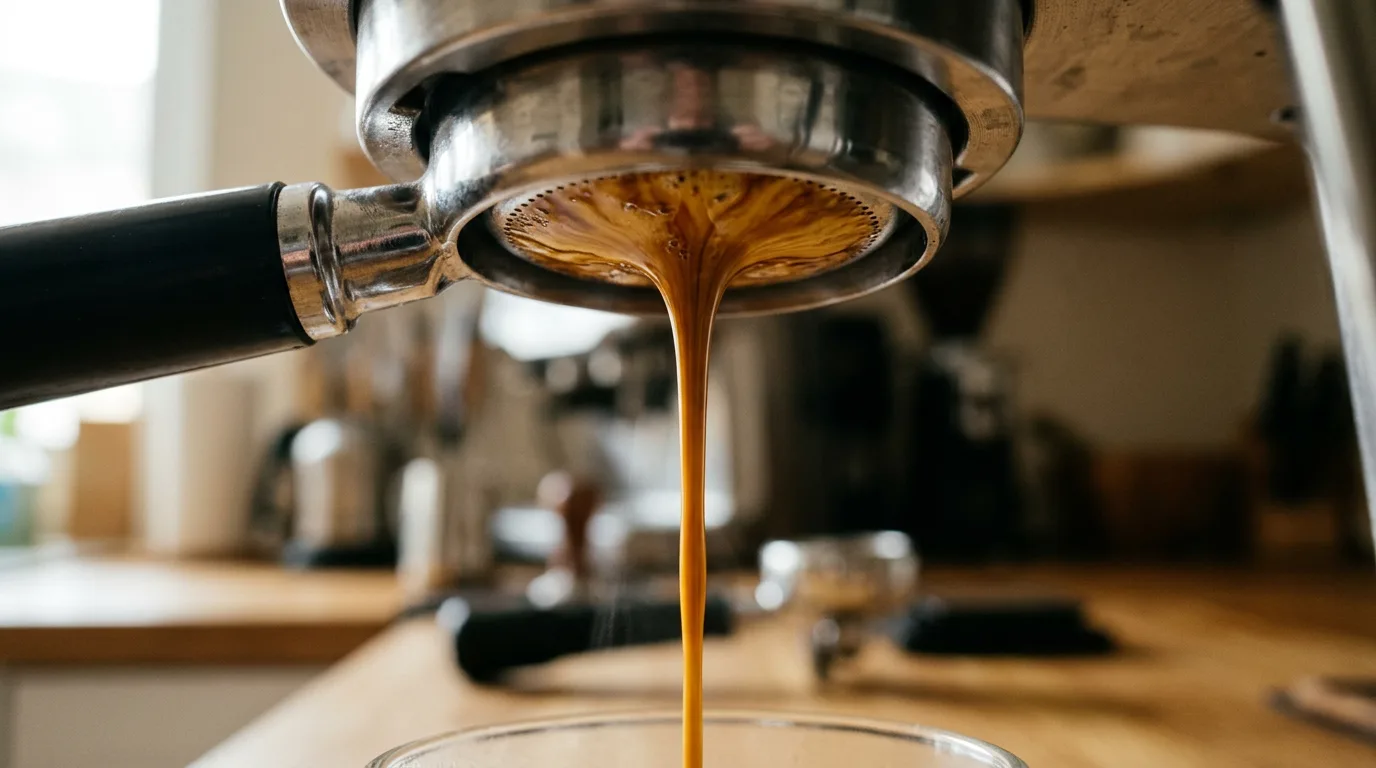
The over-extraction myth
Understanding channeling clears up a common misunderstanding. Many people assume that grinding too fine makes espresso bitter because the whole shot over-extracts.
Often that isn't what's happening. When the grind is too fine, channels form. The coffee around the channels gets hammered with water and over-extracts, while the rest of the puck barely gets touched and under-extracts.
The result tastes bitter and sour at the same time, thin and harsh. That's uneven extraction, not simple over-extraction. In fact, measured extraction often drops when shots channel badly.
This insight has led some baristas to explore the opposite extreme: coarser grinds with faster, lower-pressure shots that channel less. They're a fun experiment, though most of us still pull traditional shots day to day.
Grind size and alternative espresso styles
Traditional espresso uses a fine grind and a 1:2 ratio. But modern baristas have developed styles that use grind very differently.
- Turbo shots: a noticeably coarser grind, lower pressure and a fast shot of around 10 to 15 seconds. They channel less and can taste surprisingly sweet and clear.
- Allongé: a longer ratio of around 1:4 or 1:5 at a controlled flow, often with a medium-fine grind. It highlights clarity in light roasts.
- Blooming espresso: a very fine grind with a long, low-pressure soak before full pressure, which helps the puck saturate evenly.
You don't need to try these to make great espresso. But they show that "finer is better" isn't a law. The best grind depends on the recipe you're pulling.
Use grind for big moves, not micro-tweaks
The most practical espresso workflow I've found is to use the grinder for big directional changes, then fine-tune with dose and yield.
Start with a fixed recipe, for example 18 grams of coffee (about two-thirds of an ounce) in and 36 grams of espresso out, a 1:2 ratio.
If the shot tastes clearly off, say very sour and sharp, the grind is too coarse. Make a meaningful change finer. If it's harsh, hollow and drying, go coarser.
Once the grind gets you close to a good, balanced cup, stop turning the dial. Fine-tune with the yield instead: a little longer to soften sourness, a little shorter for more body and sweetness.
This approach has real advantages:
- Less waste. Fewer grind changes mean fewer purges.
- Less frustration. You stop chasing microscopic dial movements.
- It suits stepped grinders. Many grinders have fixed steps that are too coarse for tiny tweaks. Dose and yield fill the gaps between steps.
Someone with unlimited beans, endless patience and a top-tier stepless grinder might fine-tune entirely with grind. For the rest of us, this workflow is calmer and more reliable.
Four golden rules for dialing in your grind
Rule 1: Use grind to get into the ballpark
Keep dose and yield fixed while you change the grind to reach a roughly balanced shot. Then tweak with the other variables.
Rule 2: Grind as fine as possible without channeling
Finer usually means more flavor, up to the point where the puck starts to fail. Here's how to spot that point:
- With a bottomless portafilter: watch the basket. Spurts, pale spots or sideways sprays mean channeling.
- With a spouted portafilter: watch the flow. A slow, syrupy start that suddenly speeds up or turns pale suggests the puck has given way.
- By taste: channeled espresso tastes thin and hollow in the middle, with sharp sourness and a harsh, drying finish.
Rule 3: Change one flow variable at a time
Never change the grind and the dose together. Both control how fast water flows, so changing both makes it impossible to tell which one helped.
Rule 4: Always purge after a change
Whenever you adjust the grind, purge a small amount of coffee, usually around 5 to 10 grams depending on the grinder, so the next shot uses only the new setting.
What I learned from my own dial-in mistakes
For my first year of espresso, I treated the grinder dial as the answer to everything. Sour shot? Finer. Bitter shot? Finer again, because I assumed I needed more extraction.
I went through a lot of coffee that way. Shots got slower, more bitter and more sour at the same time, and I couldn't understand why.
The turning point was a bottomless portafilter. The first time I watched my "dialed-in" shot spray sideways from a dozen tiny jets, I realized I'd been grinding into channeling.
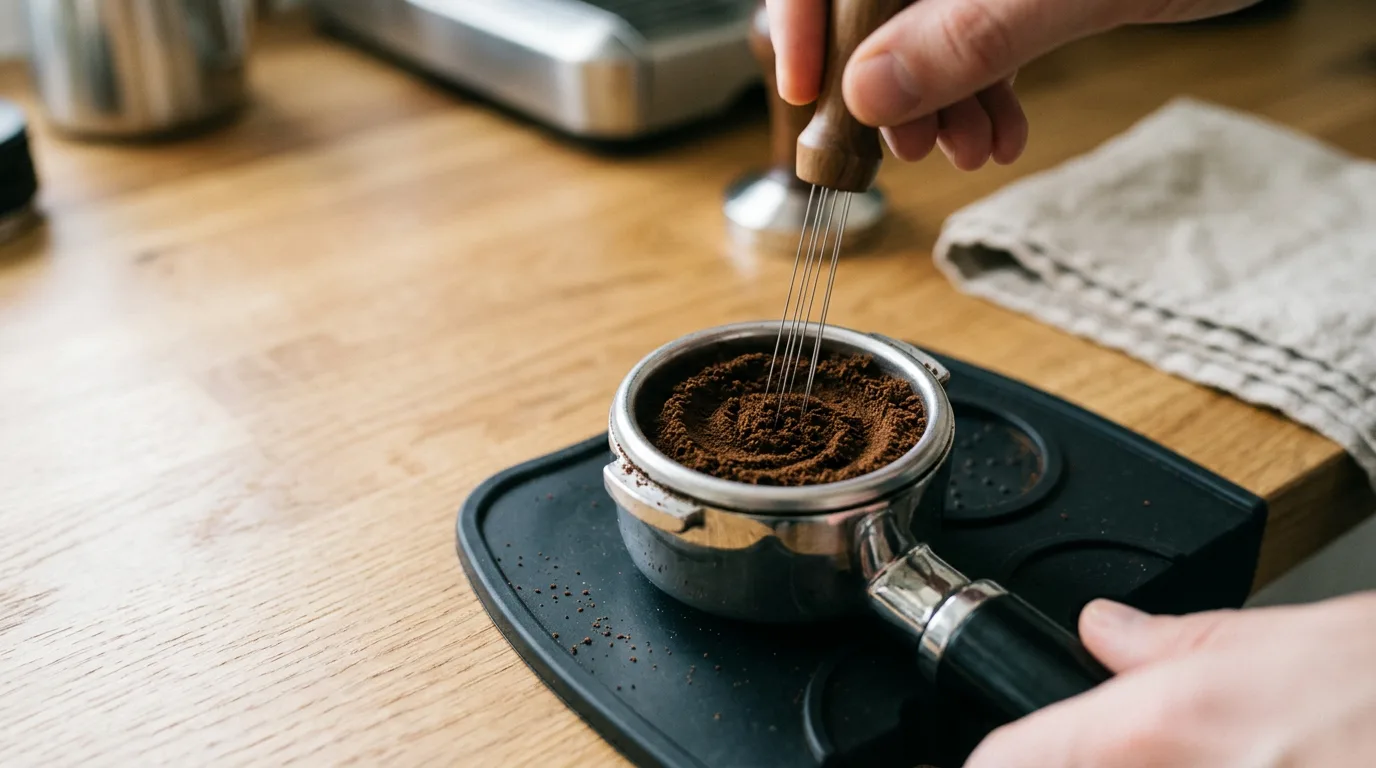
I went a few steps coarser, started distributing the grounds with a needle tool, and fixed my dose and yield. Within a week, my shots were sweeter and more consistent than they'd ever been, and I was using far less coffee to get there.
The lesson stuck: grind sets the direction, puck prep keeps the shot even, and dose and yield do the fine-tuning.
These days, when a new bag arrives, I start from the setting I used for a similar coffee, pull one shot, taste it and make at most one clear grind change. After that, I leave the grinder alone and adjust the yield by a few grams until the shot tastes balanced. Most bags are dialed in within two or three shots, and I waste far less coffee than I used to.
Dialing in espresso, step by step
- Set a recipe18 g in, 36 g out is a good start for medium roasts. Write it down.
- Prep the puck carefullyDistribute the grounds evenly, ideally with a needle tool, then tamp level.
- Pull and time the shotAim for roughly 25 to 30 seconds, but judge mainly by taste.
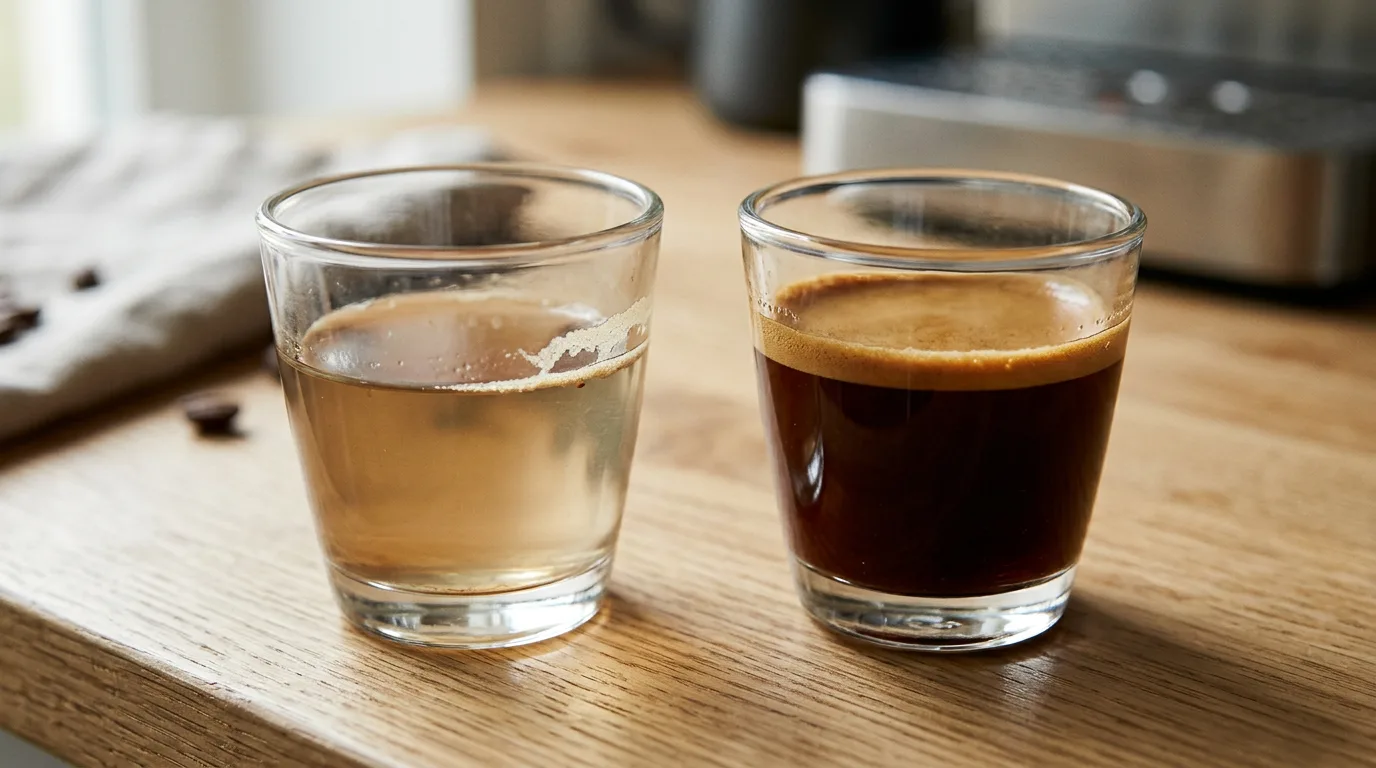
- Taste and decide the directionSour and thin: grind finer. Bitter, hollow and drying: grind coarser.
- Adjust, purge and repeatMake one clear grind change, purge, and pull again.
- Fine-tune with yieldOnce it's close, adjust the output by a few grams instead of touching the grinder.
- Note the resultRecord the setting for that coffee so you can return to it.
Our tip: Buy a small digital scale with a timer. Weighing dose and yield turns dialing in from guesswork into a simple process.
Reading the taste
Shot time is a useful guide, but your tongue is the real judge.
If you want to understand where sourness and bitterness come from, my guide to why coffee tastes bitter or sour goes into detail.
Dialing in filter coffee
Filter coffee is far more forgiving than espresso, but the same logic applies.
- Pour-over tastes sour or weak and drains fast: grind finer.
- Pour-over tastes bitter or dry and drains slowly: grind coarser.
- French press tastes muddy: grind coarser and use fewer fines; let it settle before pouring.
- Drip coffee tastes flat: try a slightly finer grind or a bit more coffee.
For filter, changing the ratio is just as useful as changing the grind. My guide to coffee brewing ratios has starting points for each method.
How roast and bean age change the grind
The right grind isn't fixed for a grinder. It shifts with the coffee you're using.
Roast level
Dark roasts are brittle and very soluble. They shatter easily, create more fines and extract quickly, so they often need a slightly coarser grind.
Light roasts are dense and harder to extract. They usually need a finer grind, and often a higher temperature, to taste sweet rather than sour. My guide to coffee roast levels explains why.
Bean age
Very fresh beans contain lots of carbon dioxide, which can make shots run unevenly. As beans age over a few weeks, they lose gas and usually need a finer grind to keep the same shot time.
Origin and processing
Dense, high-grown washed coffees often need a finer grind than softer, natural-processed coffees. Expect to adjust when you switch bags.
Our tip: Keep a simple note on your phone with the grind setting for each coffee. When you buy the same beans again, you'll start close.
How the grind changes over the life of a bag
Here's what typically happens with the same bag of espresso beans in my kitchen:
| Days after roast | What happens | Typical grind change |
|---|---|---|
| 3-7 | Lots of gas, shots can be uneven | Slightly coarser, or rest the beans |
| 7-21 | Sweet spot for most espresso | Stable setting |
| 21-35 | Less gas, shots run faster | Gradually finer |
| 35+ | Flavor fading | Finer, but quality drops anyway |
Storing beans well slows this down. My guide on how to store coffee beans covers the basics.
Batch size, decaf and blends
Bigger batches need a coarser grind
When you brew more coffee at once, the bed gets deeper and water takes longer to pass through. A pour-over for one might use a medium-fine grind, but a large batch for four in the same style of brewer usually needs to go a step or two coarser to keep the brew time reasonable.
The same applies to drip machines: a full pot can handle a slightly coarser grind than a half pot.
Decaf often needs a different setting
Decaffeinated beans have been through an extra process that changes their structure. They're often more porous and brittle, so they grind differently and can extract faster. Expect to go a little coarser than with regular beans from the same roaster. My guide to how decaf coffee is made explains why.
Blends vs single origins
Blends combine beans of different densities, which can widen the particle spread a little. Single origins tend to grind more evenly. Neither is a problem; just be ready to re-dial when you switch between them.
Grinder retention and purging
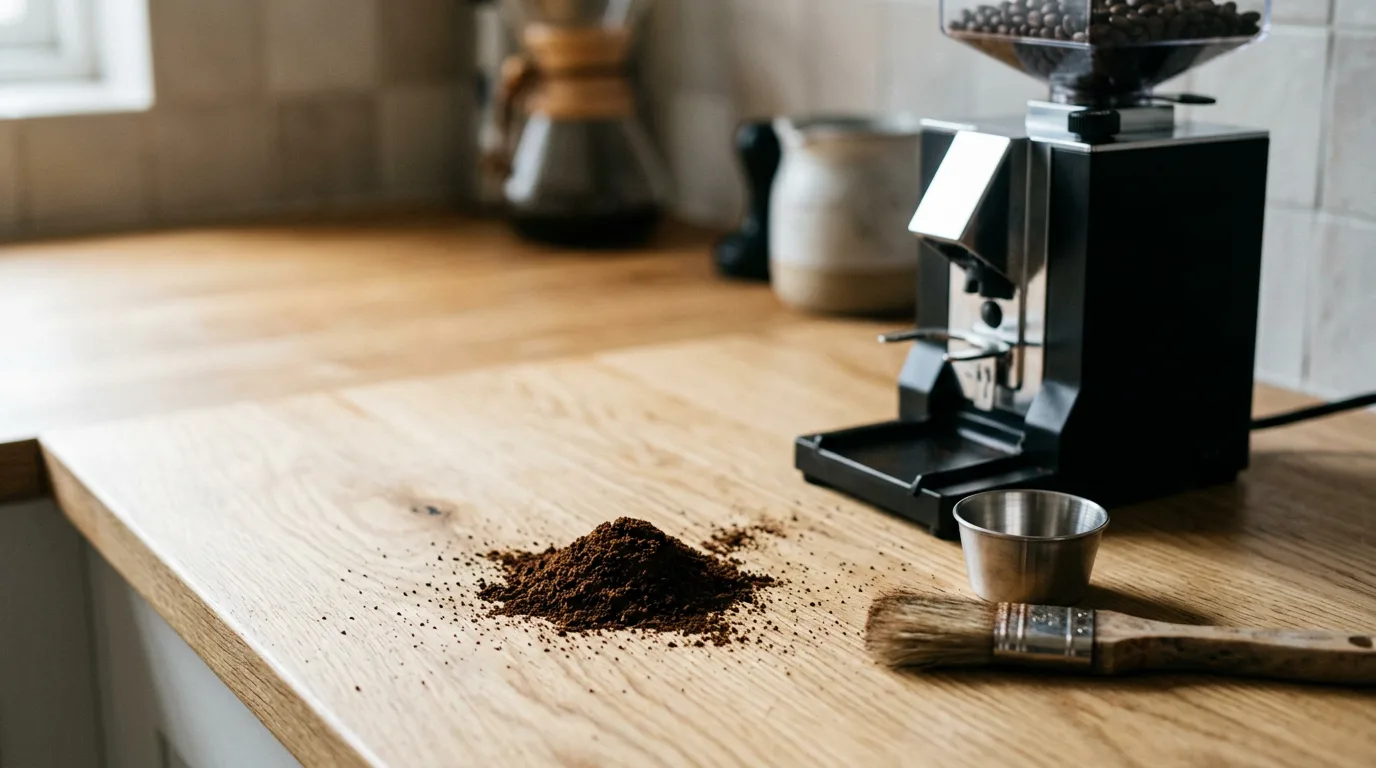
Most grinders keep a little coffee inside the burr chamber and chute after each use. That's called retention.
Retention matters for two reasons. First, the next dose includes some stale coffee from last time. Second, after you change the setting, the retained coffee is still at the old grind.
Single-dose grinders are designed to keep retention very low, which is why many home baristas like them. With other grinders, a short purge after each adjustment is the simplest fix.
Purged coffee doesn't have to go to waste. I use it for a quick cup of filter coffee or add it to the compost.
Tools that make grind size easier
- A digital scale with a timer. The foundation of repeatable dose, yield and shot time.
- A needle distribution tool. Breaks up clumps and evens out the coffee bed to prevent channeling.
- A bottomless portafilter. Shows you exactly how the puck behaves during the shot.
- A dosing cup. Catches grounds cleanly and lets you shake them before dosing.
- A small brush. Clears retained grounds from the chute between doses.
- A notebook or app. Record grind settings, recipes and tasting notes for each coffee.
None of these are expensive, and together they make grind adjustments far more predictable.
If you only pick one, choose the scale. Weighing dose and yield is what turns grind changes from guesswork into a clear cause and effect, and it helps with every brewing method, from French press to espresso.
Grind size glossary
Common grind mistakes
- Using pre-ground coffee for espresso. It's rarely fine enough and goes stale quickly.
- Trusting grinder numbers across machines. Settings aren't universal.
- Making tiny changes and expecting big results. On many grinders, a small step changes little; make a clear move.
- Changing grind and dose together. You won't know what made the difference.
- Grinding finer to fix a channeling problem. It usually makes channeling worse; fix puck prep first.
- Forgetting to purge. Your next shot will be a mix of old and new settings.
- Using a blade grinder for espresso. The particle spread is too wide to dial in.
Grind troubleshooting
| Problem | Likely cause | Fix |
|---|---|---|
| Espresso runs very fast, tastes sour | Grind too coarse | Grind finer, purge, pull again |
| Espresso chokes or drips slowly | Grind too fine | Grind coarser |
| Spurts and pale streaks | Channeling | Better distribution, level tamp, slightly coarser |
| Shot time changes every day | Bean aging, retention | Purge, adjust gradually as beans age |
| French press is gritty | Too many fines | Grind coarser, better grinder |
| Pour-over drains slowly, bitter | Grind too fine | Grind coarser |
Myths about grind size
"Finer always means stronger coffee"
Finer means faster extraction, not necessarily stronger coffee. Strength depends mostly on the ratio of coffee to water.
"Bitter espresso always means grinding too fine"
Often it's channeling from a grind that's too fine, combined with poor puck prep. Fix the prep before chasing the grind.
"Grinder settings are universal"
They aren't. Describe grind by texture and taste instead.
"Fines are always bad"
Too many fines muddy filter coffee, but some fines help build body and resistance in espresso.
The bottom line
Grind size controls surface area, flow and contact time, which is why it has such a big effect on flavor.
For filter methods, match the grind to the brew time and adjust by taste. For espresso, grind as fine as you can without channeling, use the grinder for big moves and fine-tune with dose and yield.
If you are just starting out, do not aim for perfection on day one. Get the grind roughly right for your method, brew a few cups and notice how changes feel and taste. Your palate will learn faster than any chart can teach you.
And if you are already comfortable, try paying attention to the grinder itself: how much it retains, how consistent it is and how it behaves with light versus dark roasts. Small improvements there often make a bigger difference than any new brewer.
Change one thing at a time, purge after every adjustment, and write down what works. Do that, and grind size stops being a source of frustration and becomes your most useful tool.
Frequently asked questions
What grind size is best for espresso?
A fine grind, a little coarser than flour, adjusted so a 1:2 shot runs in roughly 25 to 30 seconds and tastes balanced.
What grind size for French press?
Coarse, like sea salt.
What grind size for pour-over?
Medium-fine for cone drippers, medium for flat-bottom drippers, medium-coarse for Chemex.
What grind size for drip coffee machines?
Medium, like regular sand.
What grind size for cold brew?
Extra coarse, like peppercorns.
Why does my espresso taste sour?
Usually under-extraction: grind finer or increase the yield.
Why does my espresso taste bitter and sour?
Most likely channeling. Improve distribution and tamping, and avoid grinding too fine.
How much coffee should I purge after changing the grind?
Usually about 5 to 10 grams, depending on how much your grinder retains.

- Michael Reynolds, years of dialing in grinders at home
- Coffee preparation, Wikipedia
- Burr mill, Wikipedia
- Espresso, Wikipedia
Related guides
Burr vs blade grinder Coffee extraction explained Coffee brewing ratios explainedWritten by Michael Reynolds. Last updated November 20, 2026.